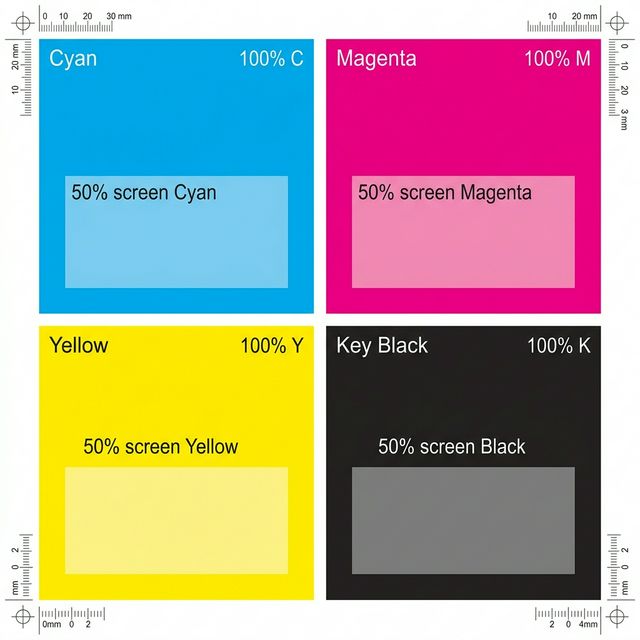
How the CMYK test isolates faults
Modern printers build every image using four primary colors: Cyan, Magenta, Yellow, and Black (CMYK). When print quality drops, it is rarely all four colors failing at once. Usually, a single microscopic printhead nozzle becomes clogged. By printing pure, unmixed blocks of C, M, Y, and K, this test immediately highlights which specific cartridge or tank requires your attention.
Interpreting channel failures
Use the results of this test to make targeted maintenance decisions:
- One complete block missing: The cartridge is entirely empty, the air vent tab was not removed during installation, or the printhead is severely blocked.
- Stripes through a single block: The cartridge has ink, but the printhead nozzles for that specific color are partially clogged. A standard cleaning cycle is required.
- Contamination: If the yellow block looks greenish or muddy, ink from the cyan or black channels may be leaking or pooling on the printhead surface.
Using printer maintenance tools
Once you know which color is failing, you can save ink during maintenance. Many Epson, Brother, and Canon printers allow you to run a “Color Only” or “Black Only” cleaning cycle. Use the results of this CMYK test to run the least invasive cleaning cycle necessary.
How to Interpret Your CMYK Test Page Results
A professional diagnostic test is only as good as your ability to read its output. When you retrieve your printed page, look for the ‘Pass/Fail’ indicators across the density gradients and vector lines. Consistent, crisp edges in the 1pt and 2pt line sections are the standard for 600dpi class machines, while the density ramps should transition smoothly from 10% to 100% without localized ‘patching’ or ‘mottling’.
What a ‘Good’ Result Looks Like
A passing CMYK Test Page result features uniform ink/toner distribution without horizontal banding or vertical streaking. In color tests, the primary cyan, magenta, and yellow channels should be vibrant and distinct, without any one channel ‘bleeding’ into the adjacent block. For alignment and border tests, the margin distances should remain within 0.5mm of the physical paper edge on all four sides.
What a ‘Bad’ Result Means
Failing a CMYK Test Page check is usually your first early-warning sign of component degradation. Sudden fading suggests a low-toner state or an inkjet nozzle blockage, while structural distortions like skewed text or overlapping lines indicate that the internal stepper motors or paper pick-up rollers require physical cleaning or professional recalibration via the manufacturer’s administrator console.
Strategic Next Steps
If your test output is inconsistent, we recommend running our universal troubleshooting walkthrough. This guided process will help you isolate whether the fault lies in your computer’s print driver, the application’s color profile, or a mechanical failure within the printer’s firing engine itself. Consistency in your maintenance routine—printing this diagnostic page at least once every 30 days—is the best way to prevent permanent hardware damage and ensure professional-grade output every time.